
This article will show you how you can add more information into your diary items that get synced to your Office 365 calendar by creating diary templates.
First, you must be signed in to your Office 365 account in Clik Service. Please go here to learn how to sign in to your Office 365 account.
Go into Settings > Settings > Communication > Office 365.
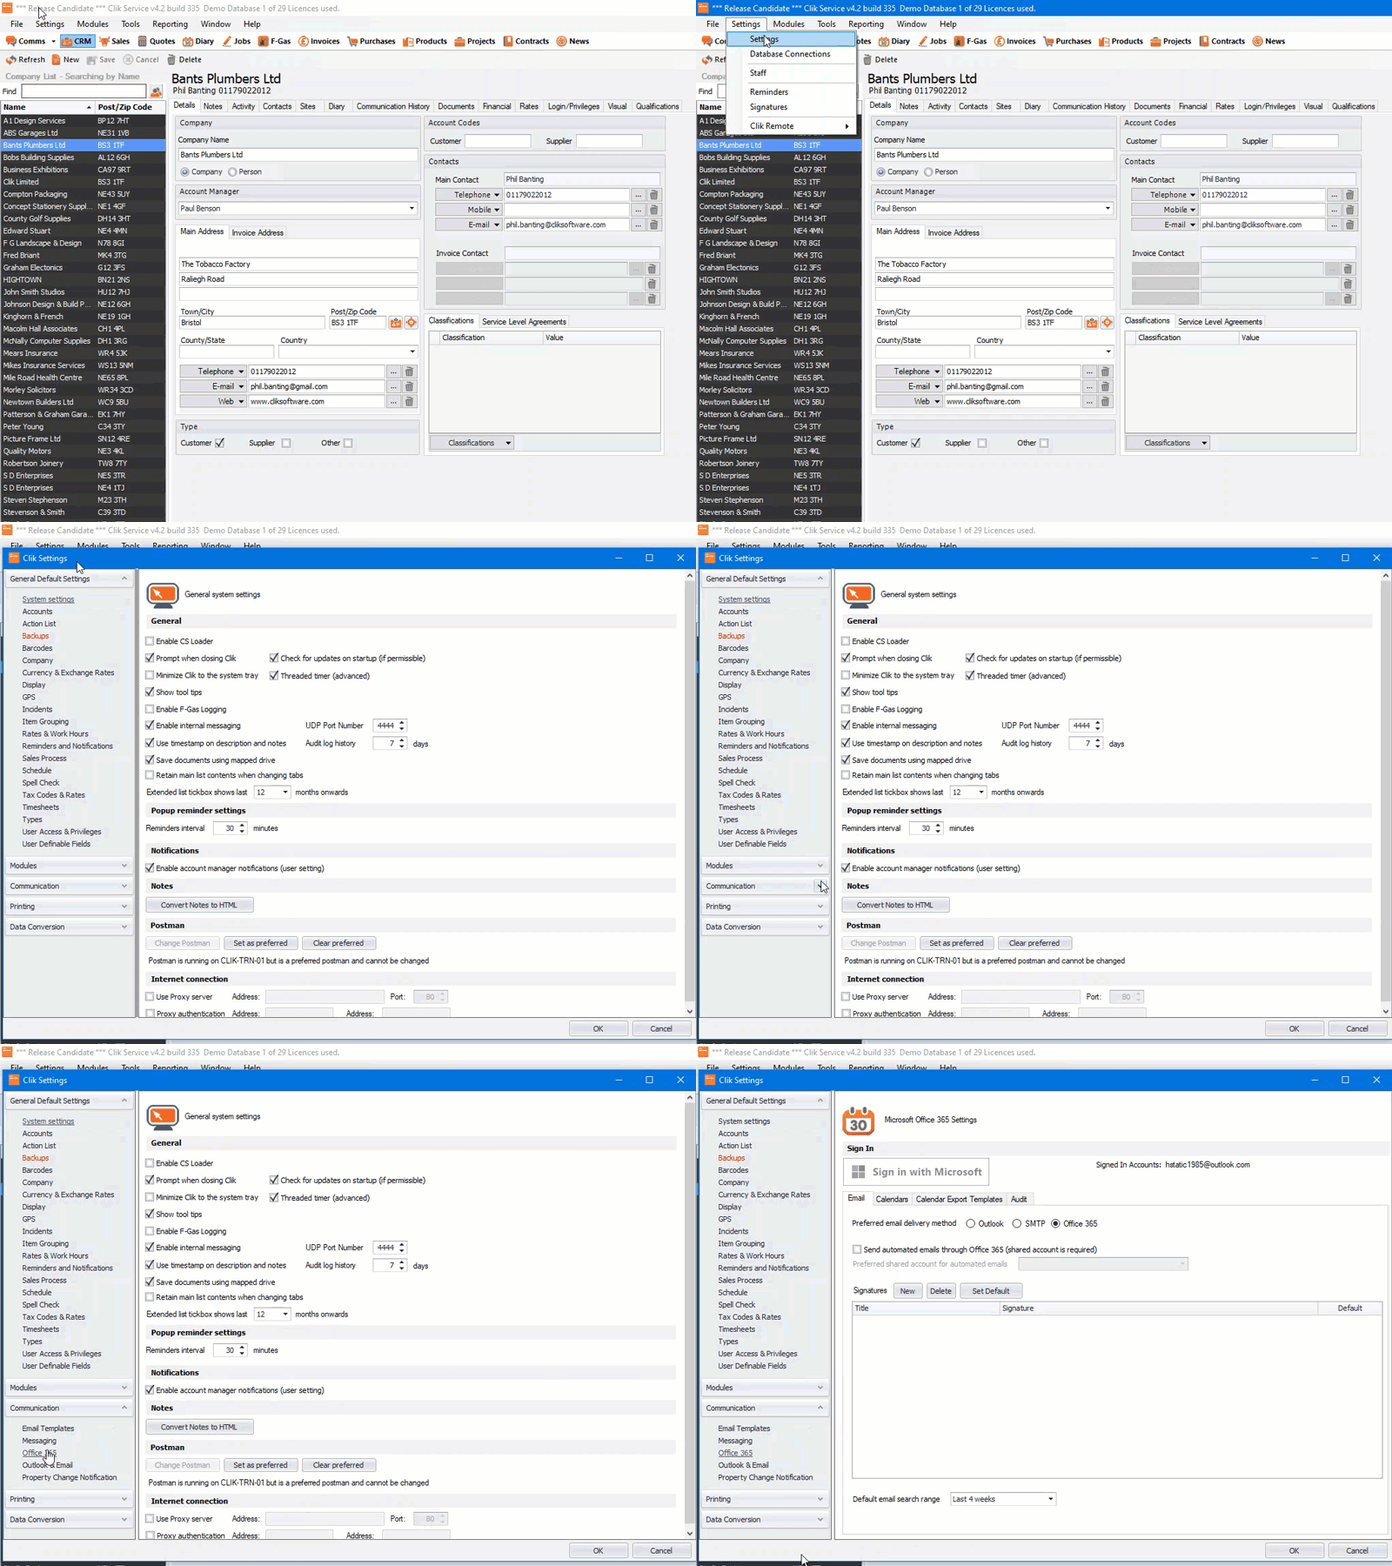
Now go to the ‘Calendar Export Templates’ and click on ‘New’.
You will now be able to create your template. First, give your template a name, in this example we have gone for “Job Planning Template”. In ‘Type’ we have selected ‘Engineer Planning’.
Next, we put a title in. In the title you can also put a tag in, which will display the information you require. For example, the tag ‘[JobNumber]’ will display the appropriate job number.

Once this is done, you can then put more information the body. The ‘Tag Lookup’ list has a number of tags you can choose from.
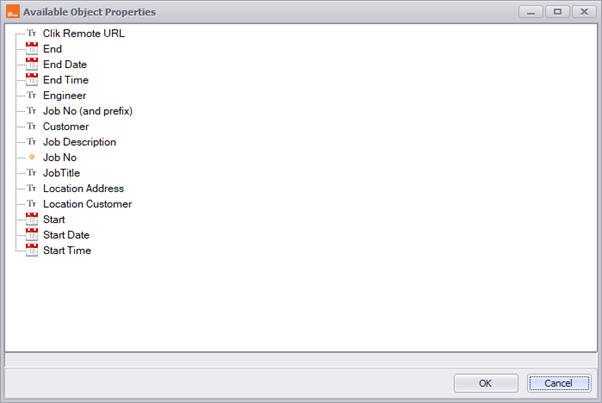
*Top tip, you will notice you can include the ‘Clik Remote URL’ this will allow your engineers to open up the job from their outlook calendar and into Clik Remote.
The template should look like something below.
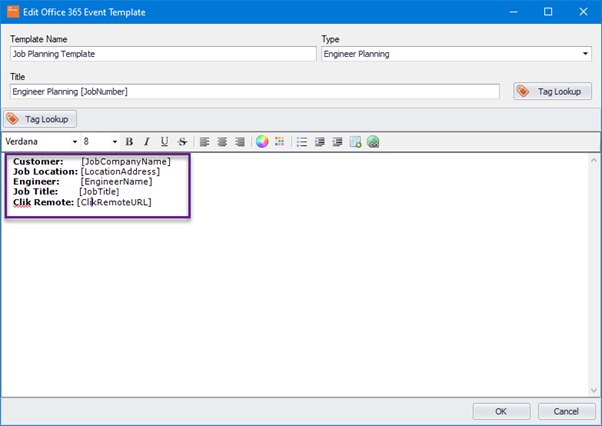
Once you’re happy, click ‘OK’.
Now let’s select the template to be used in one of your calendars. First go to the tab ‘Calendars’, select the main type you are exporting to your outlook diary, in this case, we are using ‘Job Engineer Planning’.
Go to the template option and select the template you have created.
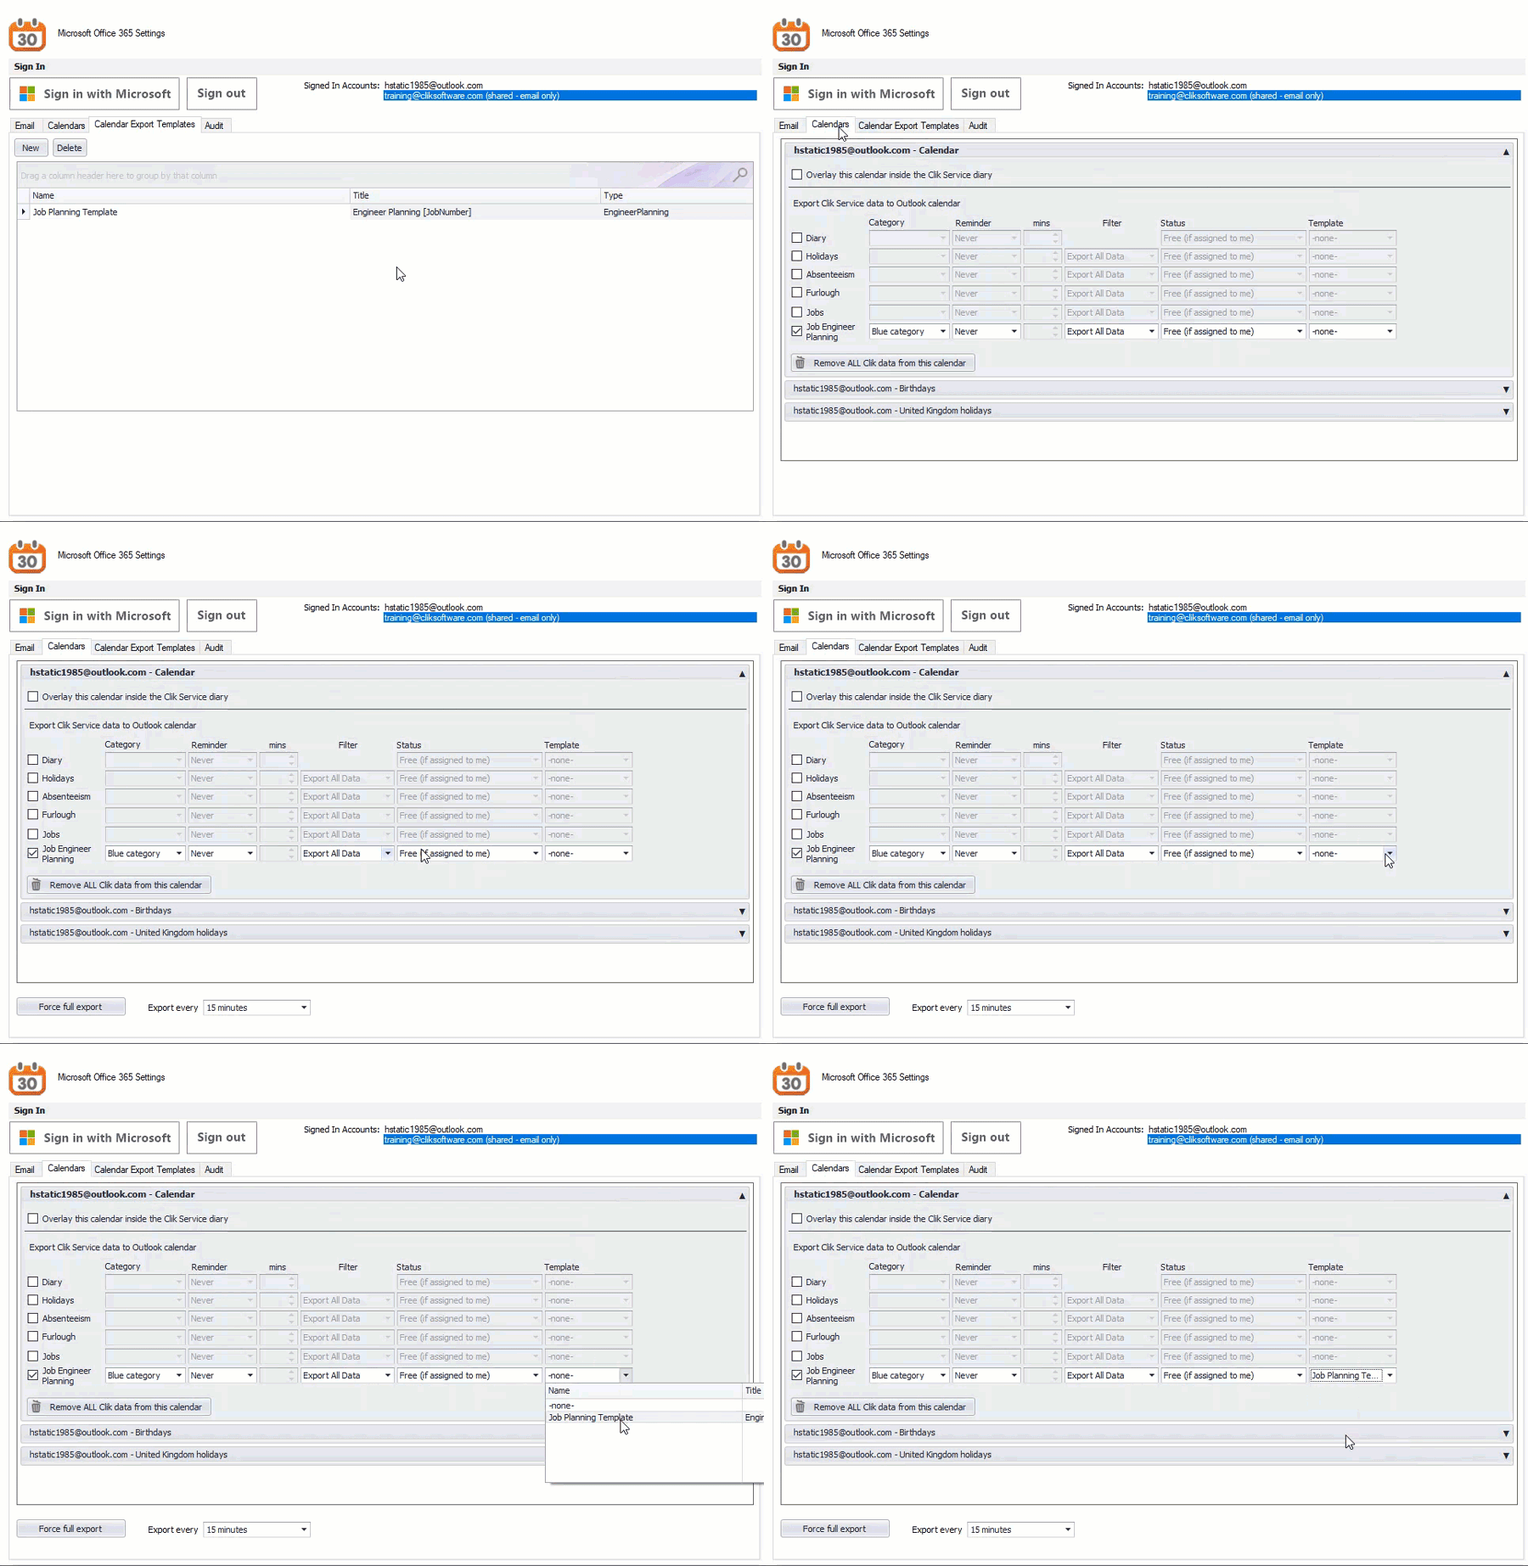
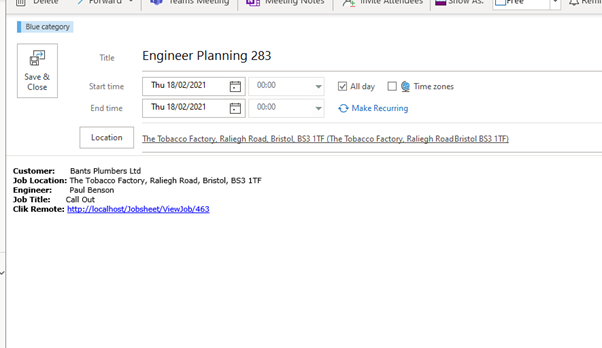
That’s it, you will now see more information about that job when you click on the diary entry.
This was added in update v4.335. Make sure to update your software to get all the latest updates and improvements.
Comments
0 comments
Please sign in to leave a comment.