
To set up your email signature for Office 365, you need to first make sure you have access to Office 365 in Clik Service. If you have admin privileges, see this article on how to sign in to your Office 365 account. If you do not have admin privileges, you will need an admin user to allow you to set up your account.
Once you have connected your Office 365 account, go to Settings > Settings.

Then go to Communication > Office 365 and click on ‘New’. You can then type or copy and paste your signature in the box.
Then give your signature a title at the bottom of the screen. Click ‘Ok ‘and this will show the signatures list.
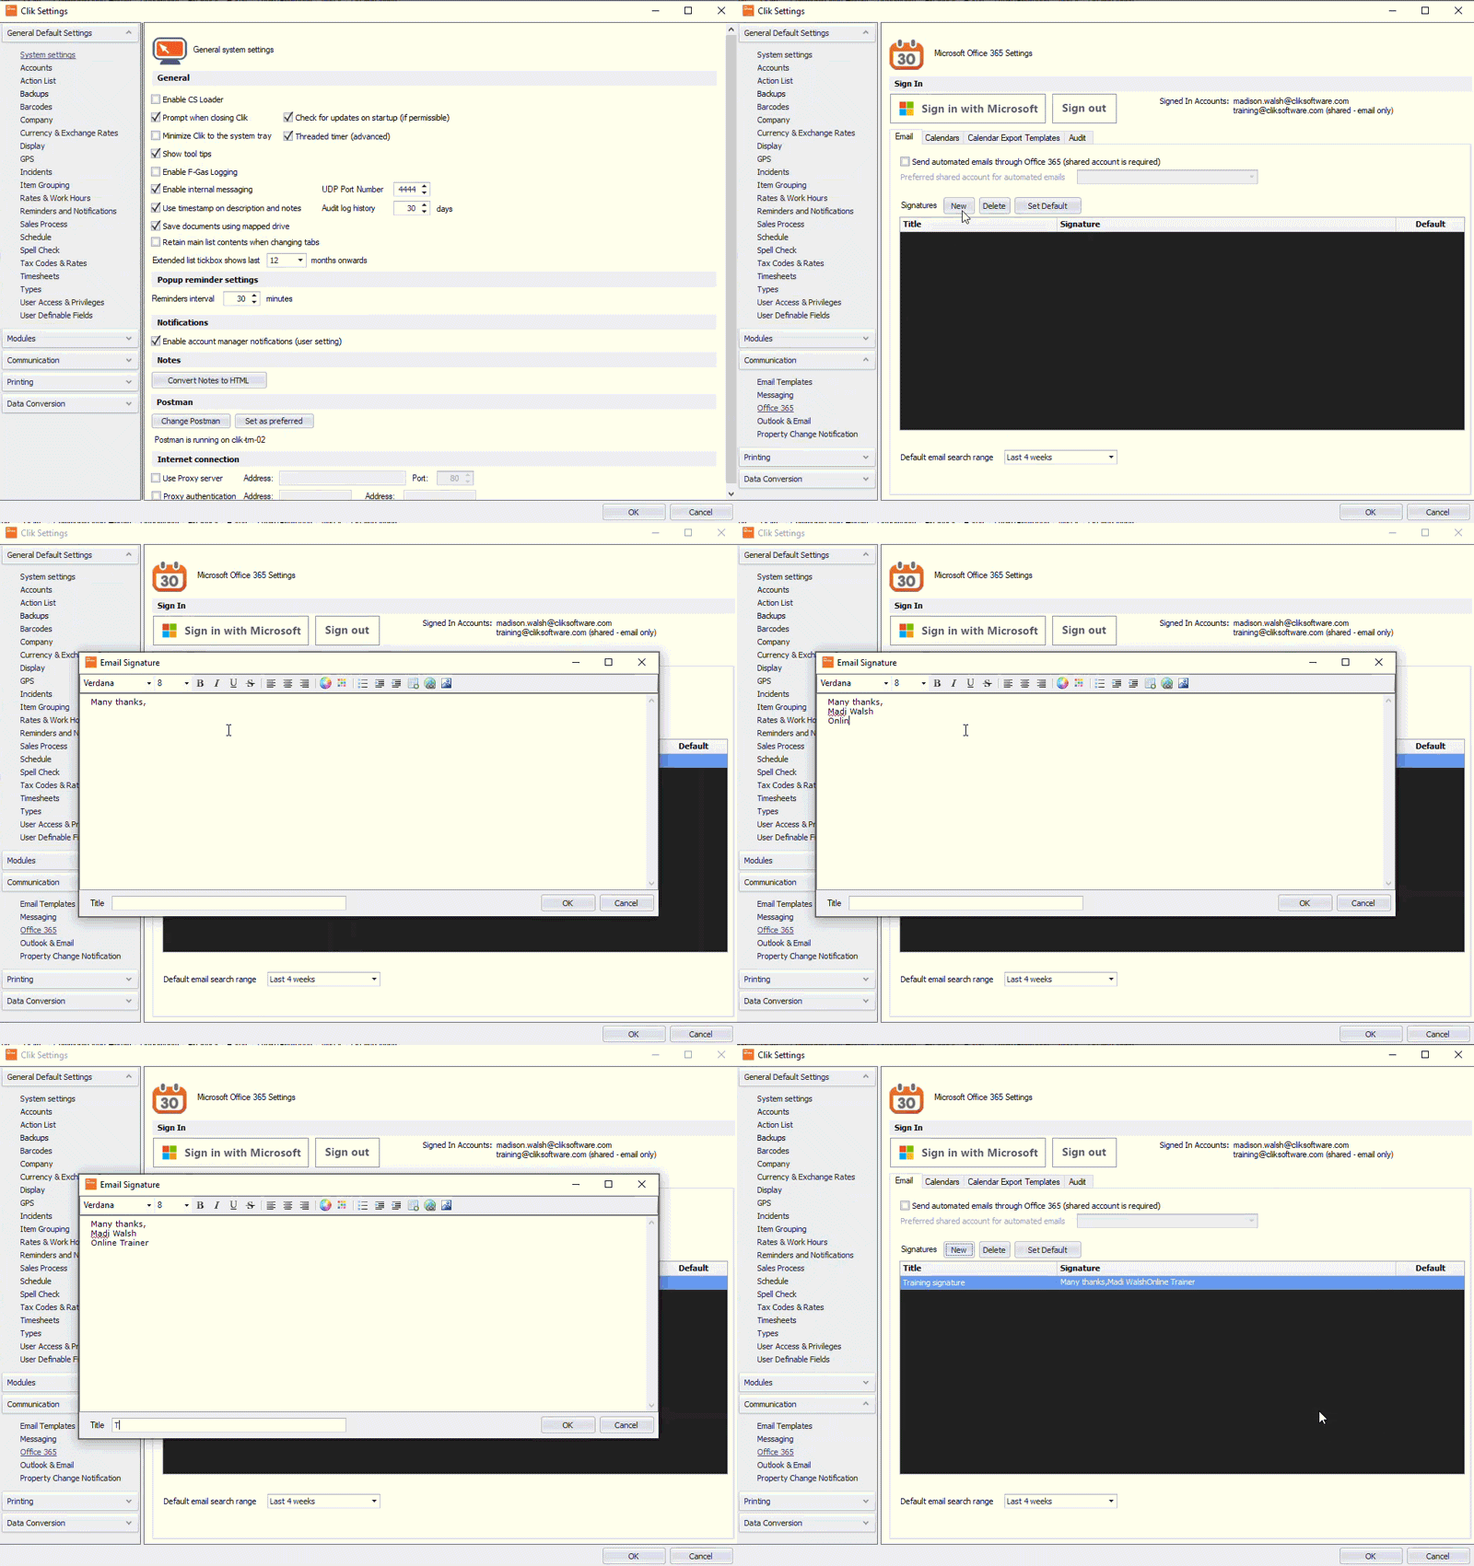
If this is your default, click on the signature to highlight and click ’Set default’.

This was added in update v4.335. Make sure to update your software to get all the latest updates and improvements.
Comments
0 comments
Please sign in to leave a comment.