This article will help you to install the NICEIC Cert Software on a client machine. The Client installer will be required if you have already set up the Server and you require the software to be accessible on multiple machines.
You should receive an email with all the details you need to install the software. If you have not received this email or you are unsure which installer you require, please contact our support team.
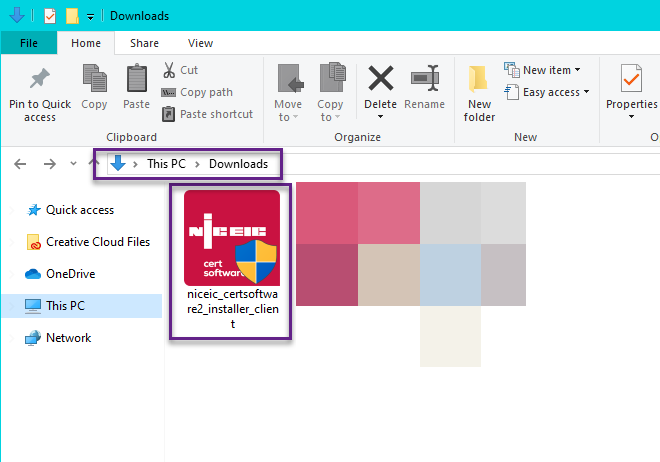
The first thing to do is click the download installer link, once downloaded you can run the installer by double-clicking on the NICEIC Icon in your “Downloads” folder.
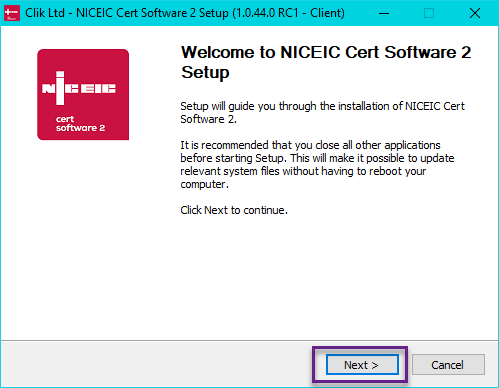
You will get a splash screen as below. Click ‘Next’.
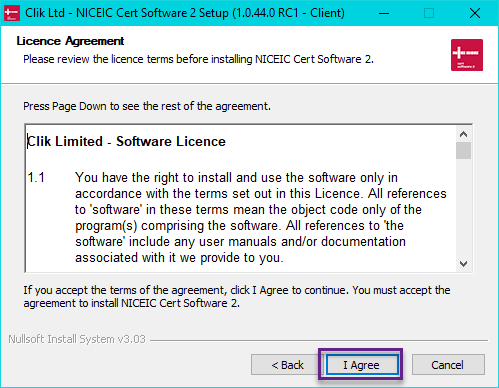
You will be prompted to agree to our terms and conditions, please read and click ‘I Agree’ if you’re happy to continue.
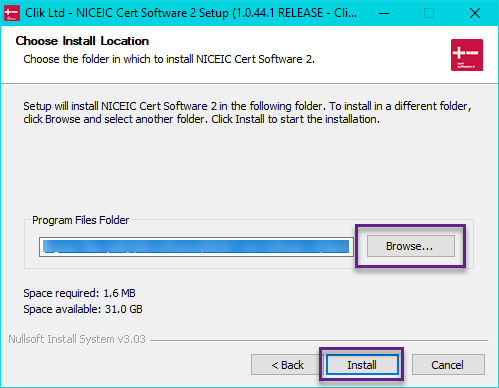
You will then get the opportunity to choose the destination folder for the software on the below screen. Once the correct destination has been selected, click ‘Install’. The install will complete.
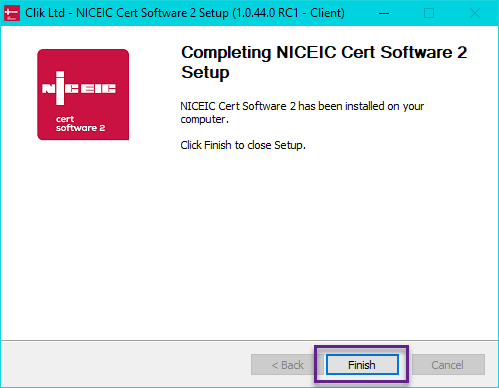
Click ‘Finish’ at the end.
You can then open the software by selecting the desktop icon.
You will then be greeted by the setup screen.
You will be prompted to enter the connection passcode from the Server software. This would have appeared when you first installed the server. You can find a copy of this passcode in the main software; follow the steps in this article.
If you do not have a connection passcode, click ‘Next’ to browse for the server location.

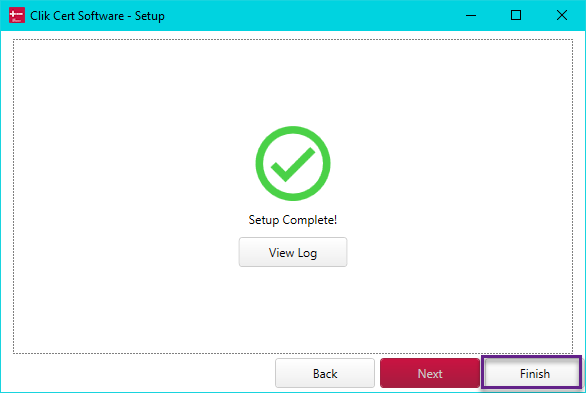
The setup process will then be completed. Click ‘Finish’.
You will then need to log on. You can use the default ‘Admin’ user to get logged in for the first time. You can find the password for this in the installation email.
See the links below for further help with setting up the software:
This installation process was emended in update v1.0.44, if the setup appears differently for you, please contact our support team to make sure you have the latest update.
Published: December 2018
Last Updated: November 2019
Comments
0 comments
Article is closed for comments.