
This article will show you how to connect Clik Service with your Gmail account.
Set Up Gmail
First, you will need to allow Clik Service access to send emails through your Gmail account.
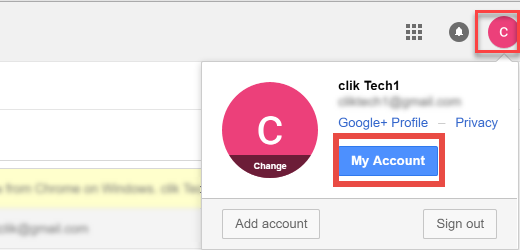
Sign in to your Gmail and go to 'My account'.
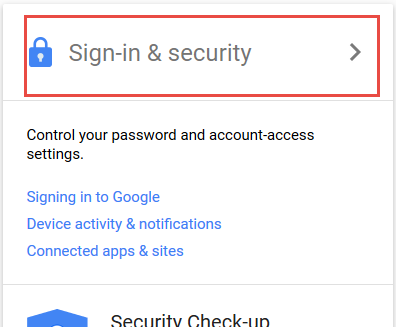
Next, click on 'Sign-in & security'.
Make sure 2-step verification is off for now.
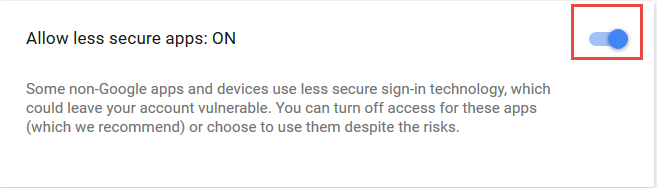
Then scroll to the bottom of the page and change the allow less secure apps slider to on.
Now you need to turn 2-Step verification back on and go through the setup of 2-step verification.
You will then need to create an app password that Clik will use to access Gmail and create Clik as an App.
To do this, go to ‘App Passwords’, select “Other (custom name)” from the ‘Select app’ drop-down and enter a name e.g “Clik”. Then, click ‘Generate’. Google will then create an app password for you.
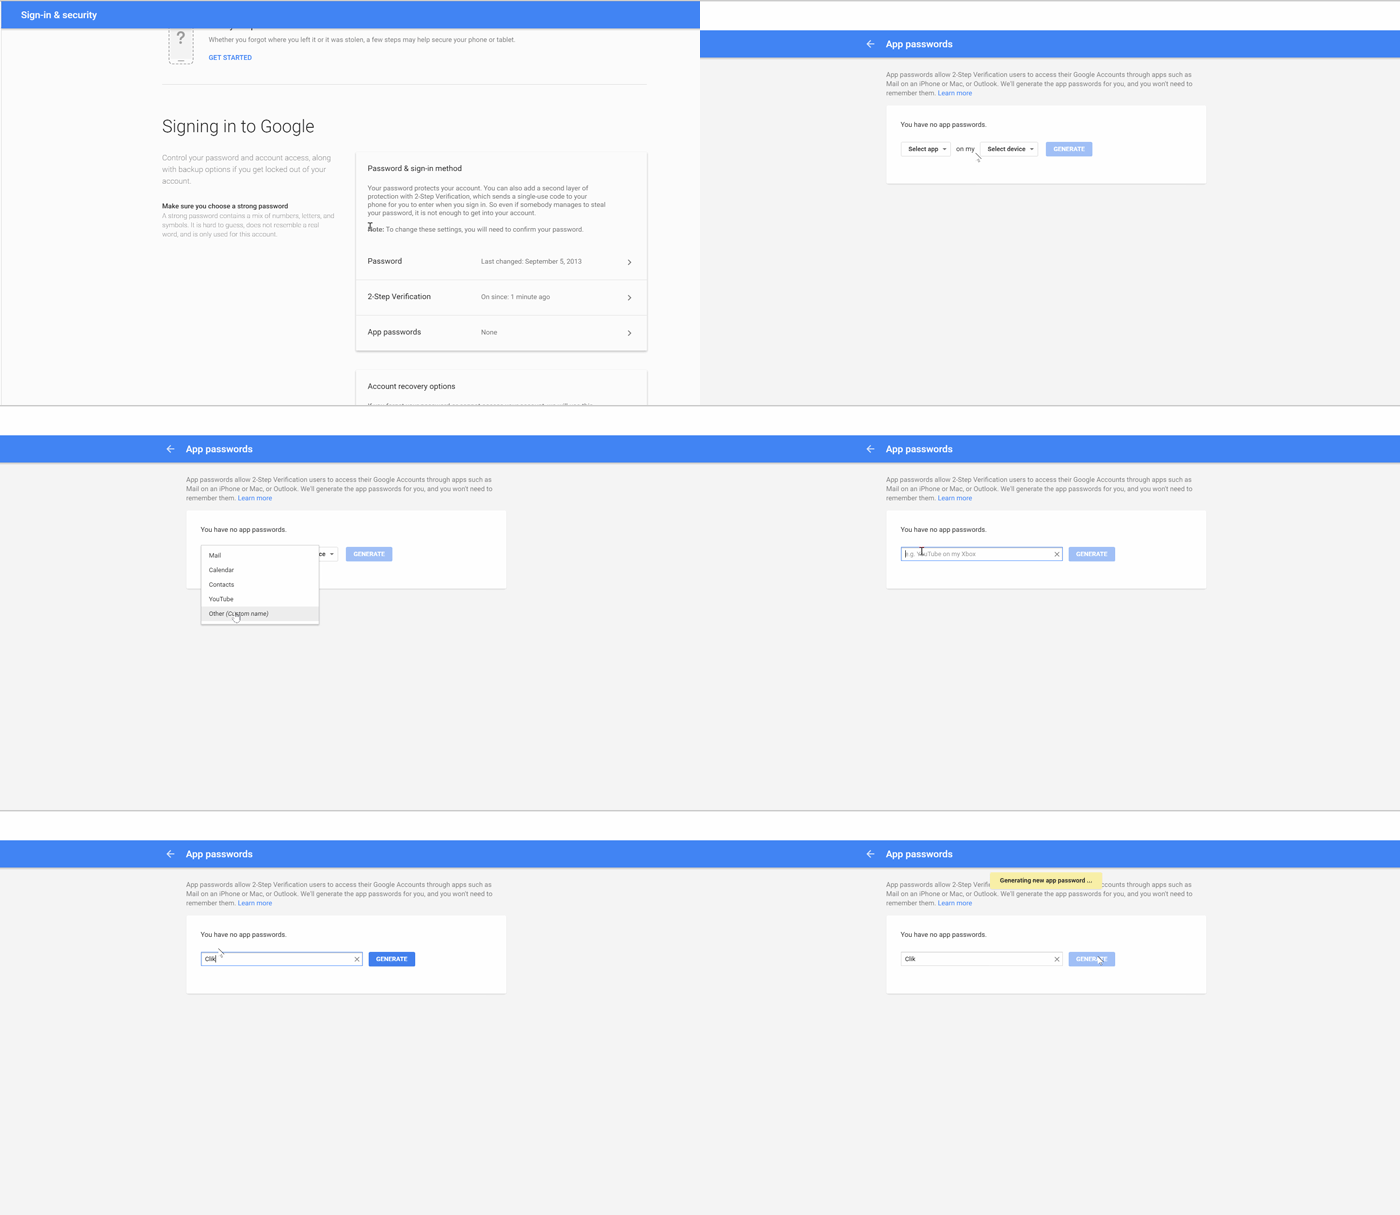
Copy the password or save it somewhere, as you will need this to set up Clik Service with Gmail.
Now we’re ready to set up Clik.
Set Up Clik For Gmail
First, go to Settings > Settings > Communication > Outlook & email.
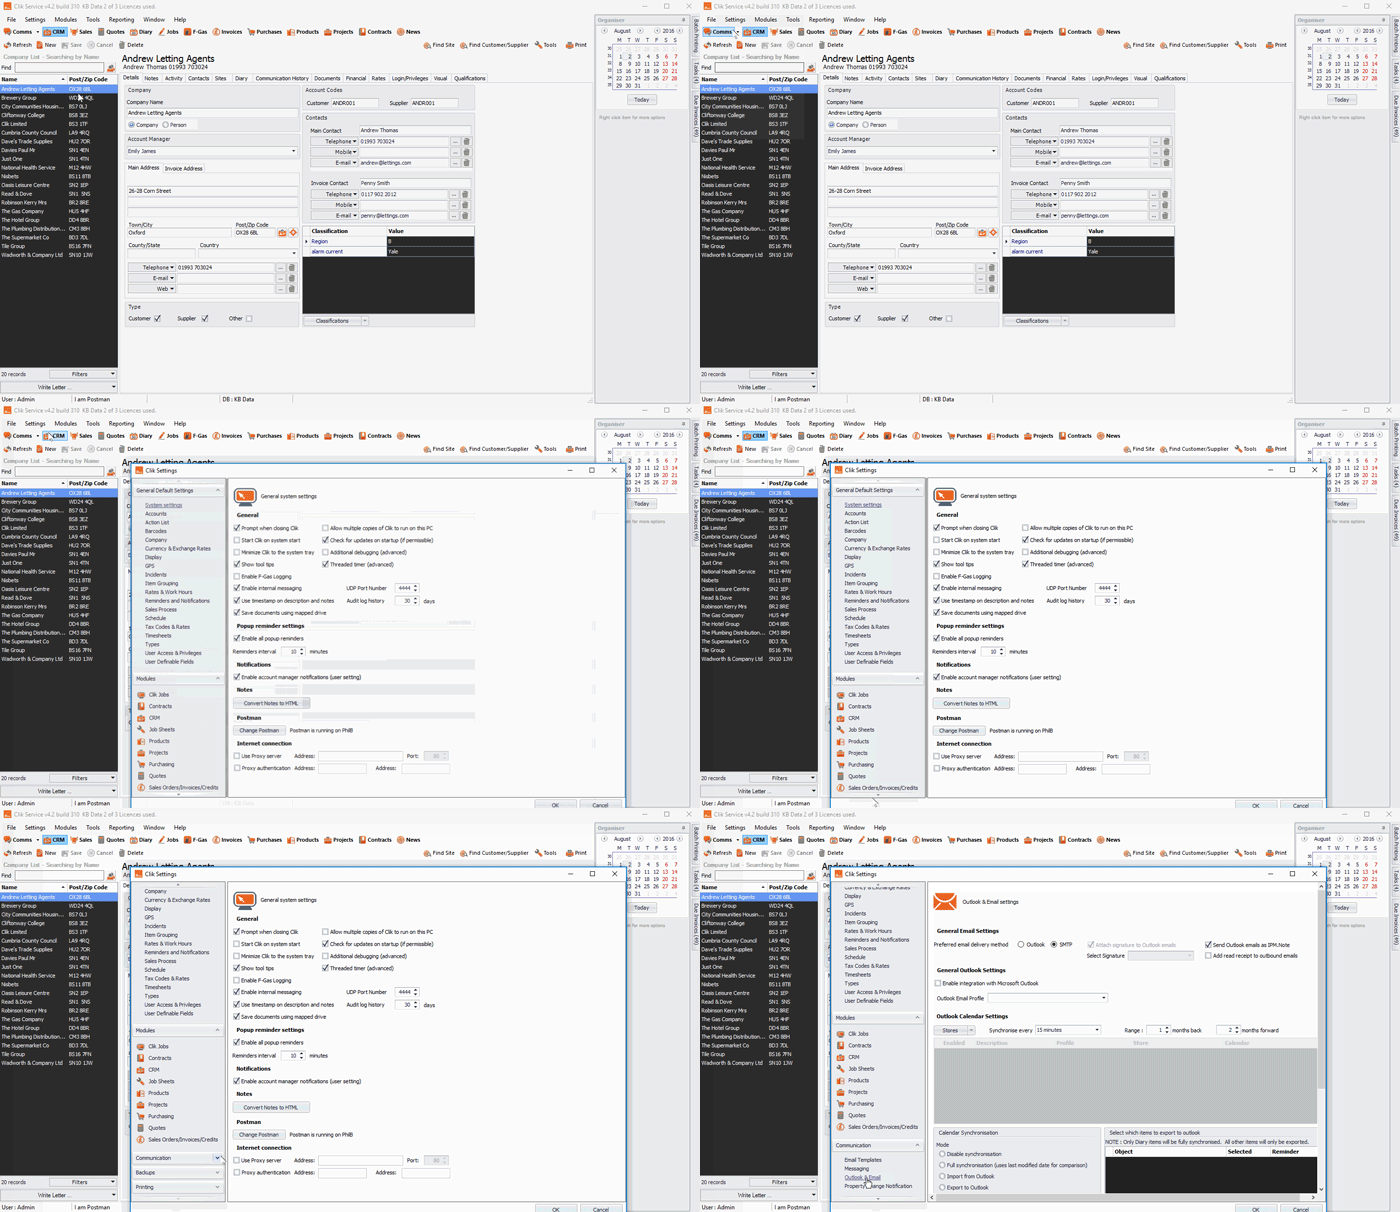
You can now enter your details under ‘SMTP Email Settings’, found at the bottom of the page.
The SMTP for Gmail will always be "smtp.gmail.com" and the port will be "587".
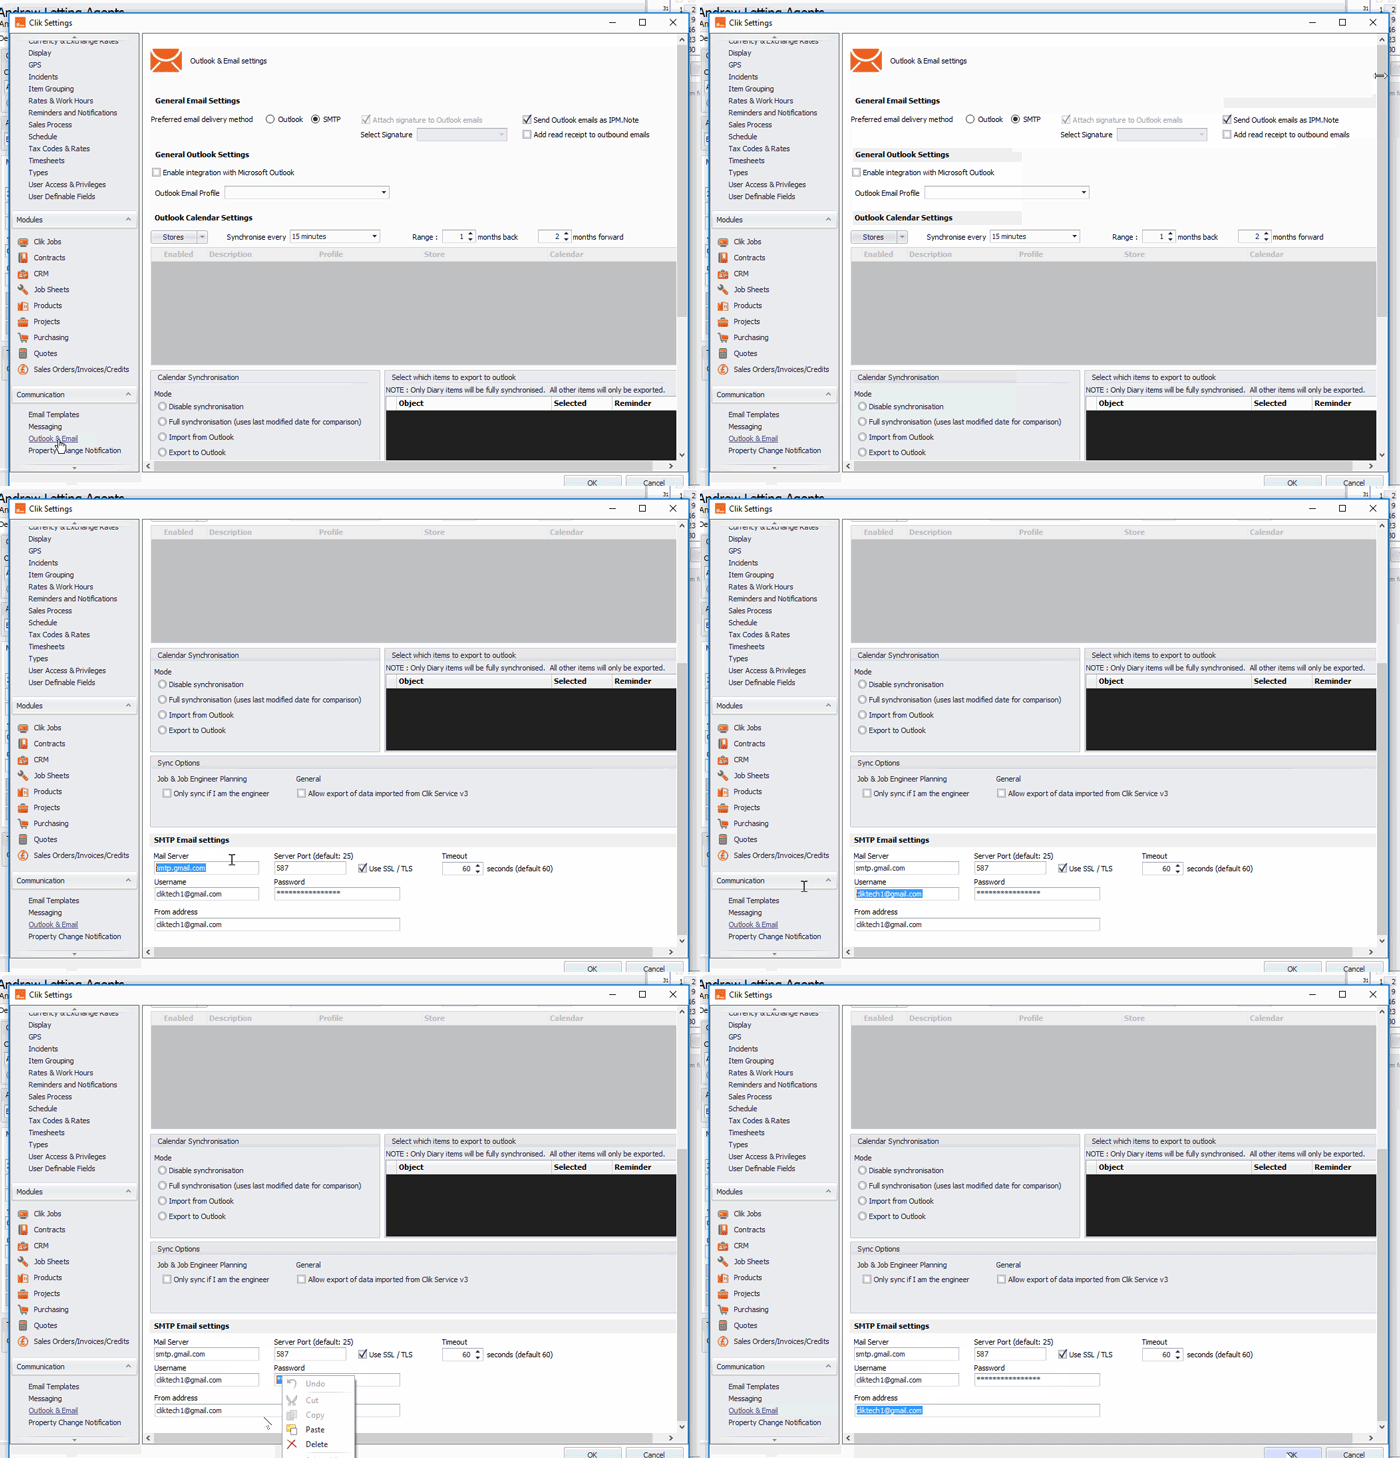
You will now be able to send emails through your Gmail account.
December 2016
Comments
0 comments
Article is closed for comments.